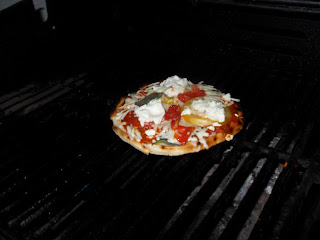
Since we were both craving something different last night it seemed like the perfect time to try it out. We made two pizza doughs, a wheat free (which we have constantly had problems cooking) and a regular crust. The garden has also produced us some FANTASTIC yellow tomatoes so we used those, goat cheese, mozzarella, feta, basil, and my homemade pizza sauce as toppings. OHMYDROOLONMYSHIRT, delicious toppings!
The benefit to BBQing your pizza is that it gets a perfect crust on the outside and gets to a high enough temperature (that your everyday oven can't get to) that you get the "pizza oven" effect where your middle is light yet dense. It also infuses your pizza with a rustic smokey taste like you would find in a traditional Pizzeria
Dinner
Top you pizza on the cooked side with sauce, toppings, and the kitchen sink.
Return the pizza to the BBQ and place (raw side down) back on an oiled grill. Let it sit at a high temperature for about 30 seconds with a closed lid then turn down the heat so as not to burn the pizza. Let it sit under the closed lid for as long as it takes to melt your toppings and cook your crust (just check it to see it doesn't burn), about 4 minutes.
If your crust is done but the toppings aren't melted, just stick it under the broiler in your oven for a couple minutes.
__________________________________________________________
- Wheat Free Pizza with all the toppings
- Regular Crust Pizza with all the toppings
- A $8.99 bottle that referenced dogs(!!), Dog Tail Vineyards Cabernet Sauvignon (California)
What success, we cooked both pizzas perfectly in the dark on our BBQ and will never go back. I love this pizza.
__________________________________________________________
BBQed Pizza
Prepared Uncooked Crust (make your own or store bought)
Oil for the Grill
Pizza Toppings
First, before you start cooking away, HEAT UP YOUR BBQ, the hotter the better. We turned ours on "max heat". --side note, pull BBQ away from vinyl siding when you have it up this high, it does melt, will post pictures later.
Spread your pizza dough into the desired thickness and shape (I like round, Max like oval) The thinner you make this this more crispy it will be.
Your grill should be upwards of 500 degrees at this point. Take your oil and pizza dough out to the grill. Gently (and carefully) oil the grill with a rag/brush and oil then lay the pizza dough on the grill. If there is a wayward flame turn the grill down so its not hitting the crust directly. Close the lid and let it cook for a minute or two, until the side looks done. Remove and take back to your kitchen.
Top you pizza on the cooked side with sauce, toppings, and the kitchen sink.
 |
| On the grill. |
If your crust is done but the toppings aren't melted, just stick it under the broiler in your oven for a couple minutes.
__________________________________________________________
Wine Verdict?
Blech. We both found it very heartburn inducing and it had a super vinegar tinge to it with little flavor. Cute bottle though?

No comments:
Post a Comment